This is a repost of a tutorial I made on the Castagne discord in september 2025 after seeing a lot of questions on it. It explains basics of spritesheets to beginners!
QUICK SPRITESHEET GUIDE FOR CASTAGNE
How to put separate sprites into a spritesheet that can go in Castagne Prerequisites: you gotta have your sprites on hand
I’m gonna do this with gimp but you can use any image manipulation software
You can start either with separate images, or with a spritesheet that’s not in the correct format. In any case, you’re gonna have to separate sprites manually
STEP 1 : FINDING WHAT TO PUT IN A SPRITESHEET,
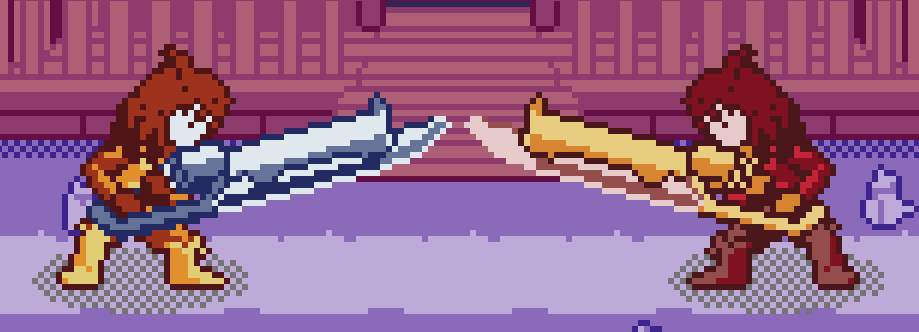
You can make as many spritesheets as you want, so you could put all your sprites into one spritesheet, or even do one spritesheet per sprite. My preference is to put a sheet for related sprites: here for example I’m going to use the prototype sprites for Aster’s 5P chain, which has 4 attacks. That’s about 12 sprites total.
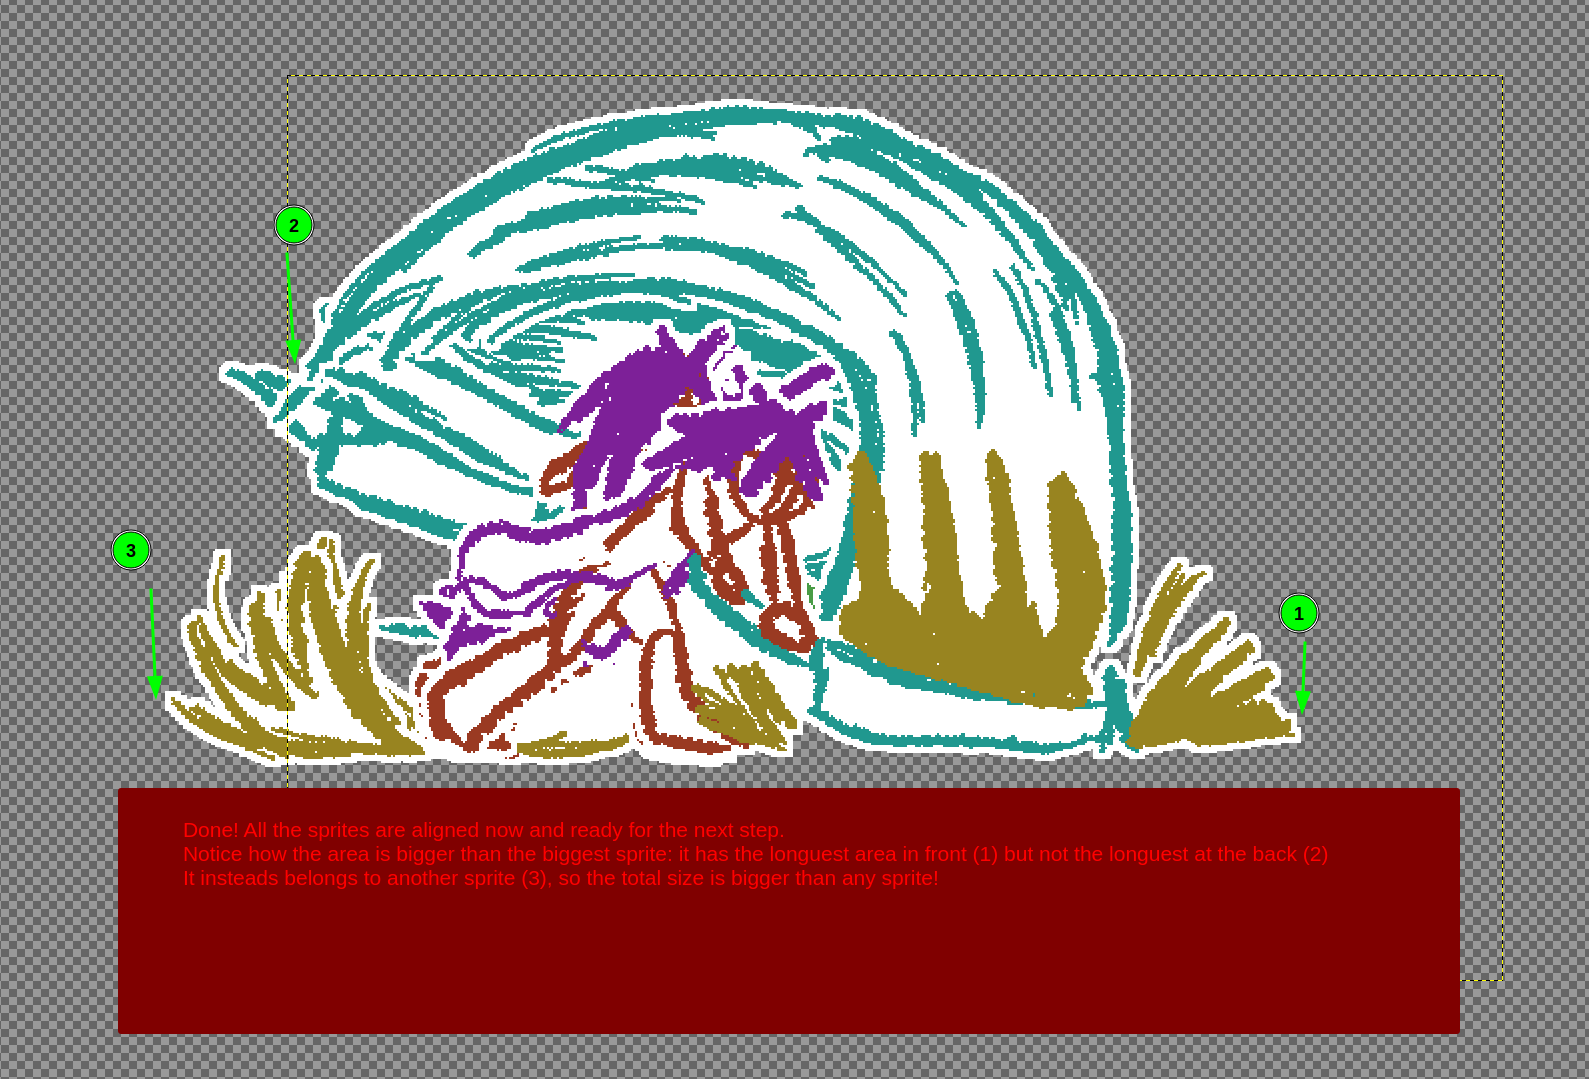
A restriction of these spritesheets is that all sprites are the same size, so having a single big sprites and many small ones, or one big vertically and one big horizontally is going to lead to wasted space
STEP 2: GATHER AND ALIGN THE SPRITES
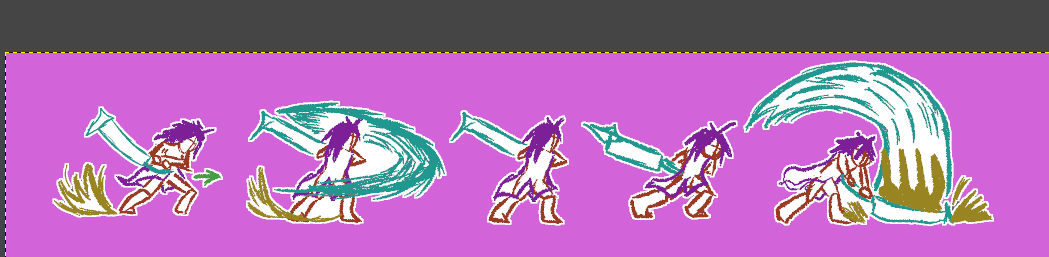
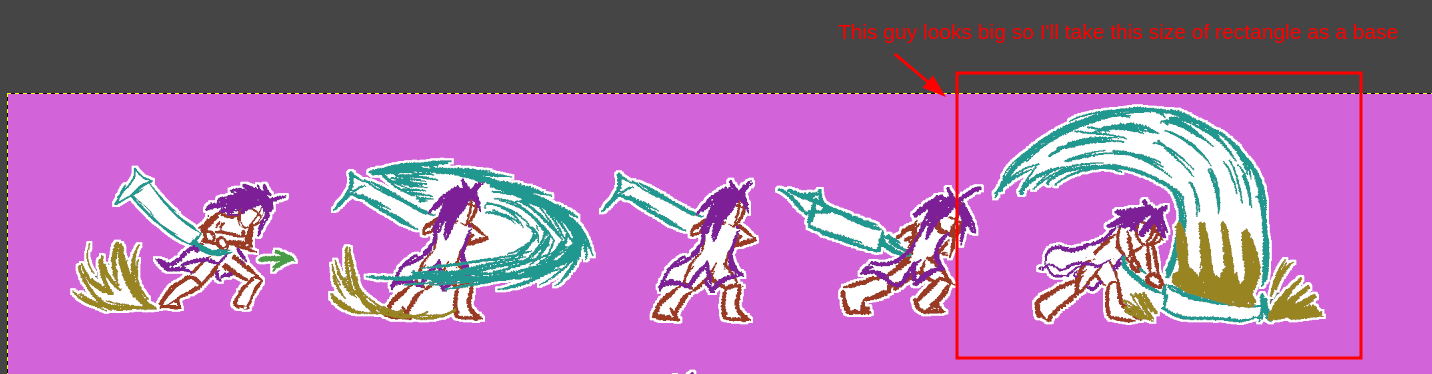
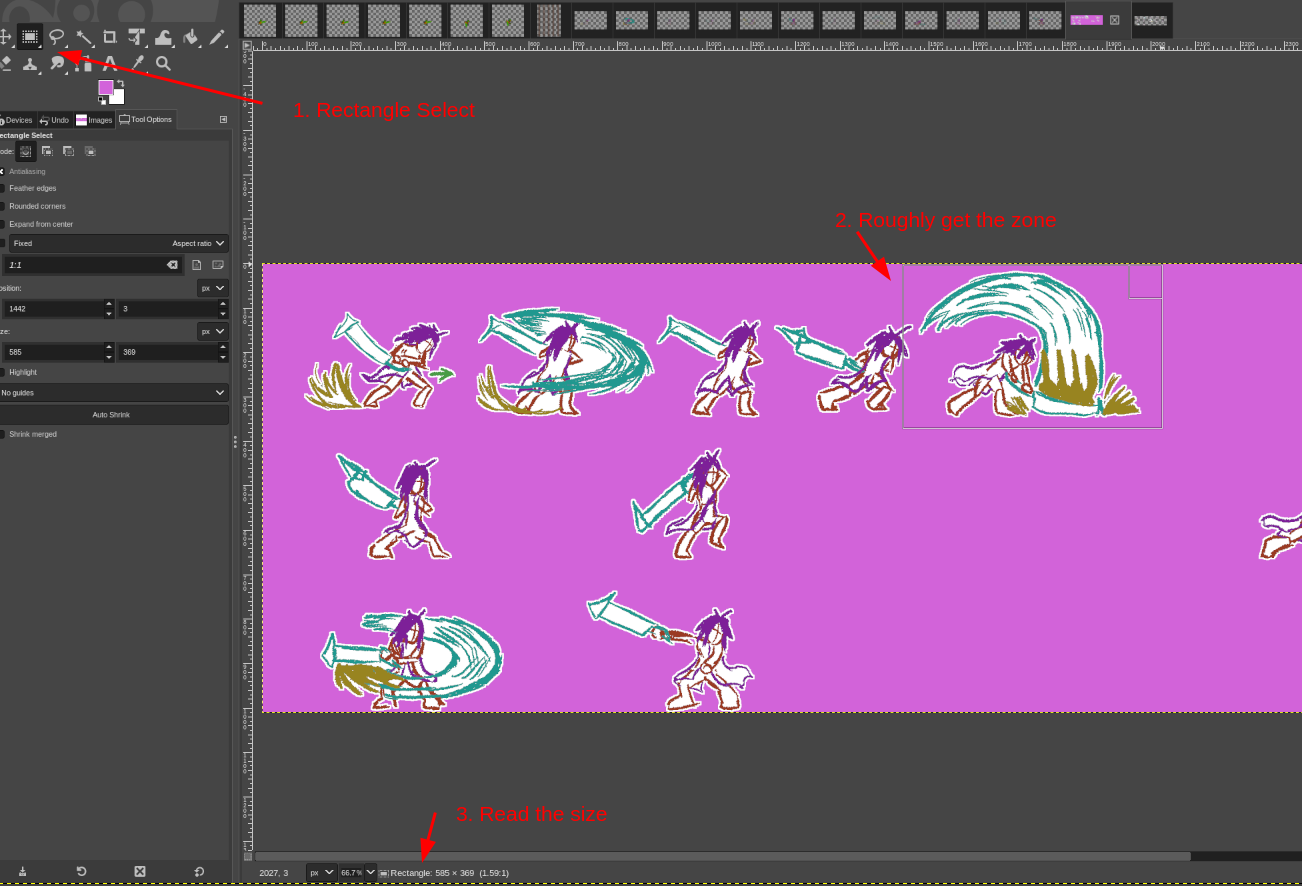
There’s a few parts to this. First, you have to decide on a rough sprite size for your draft. Take the sprite that looks the biggest. You’re going to create an empty image of twice that size to give you some room
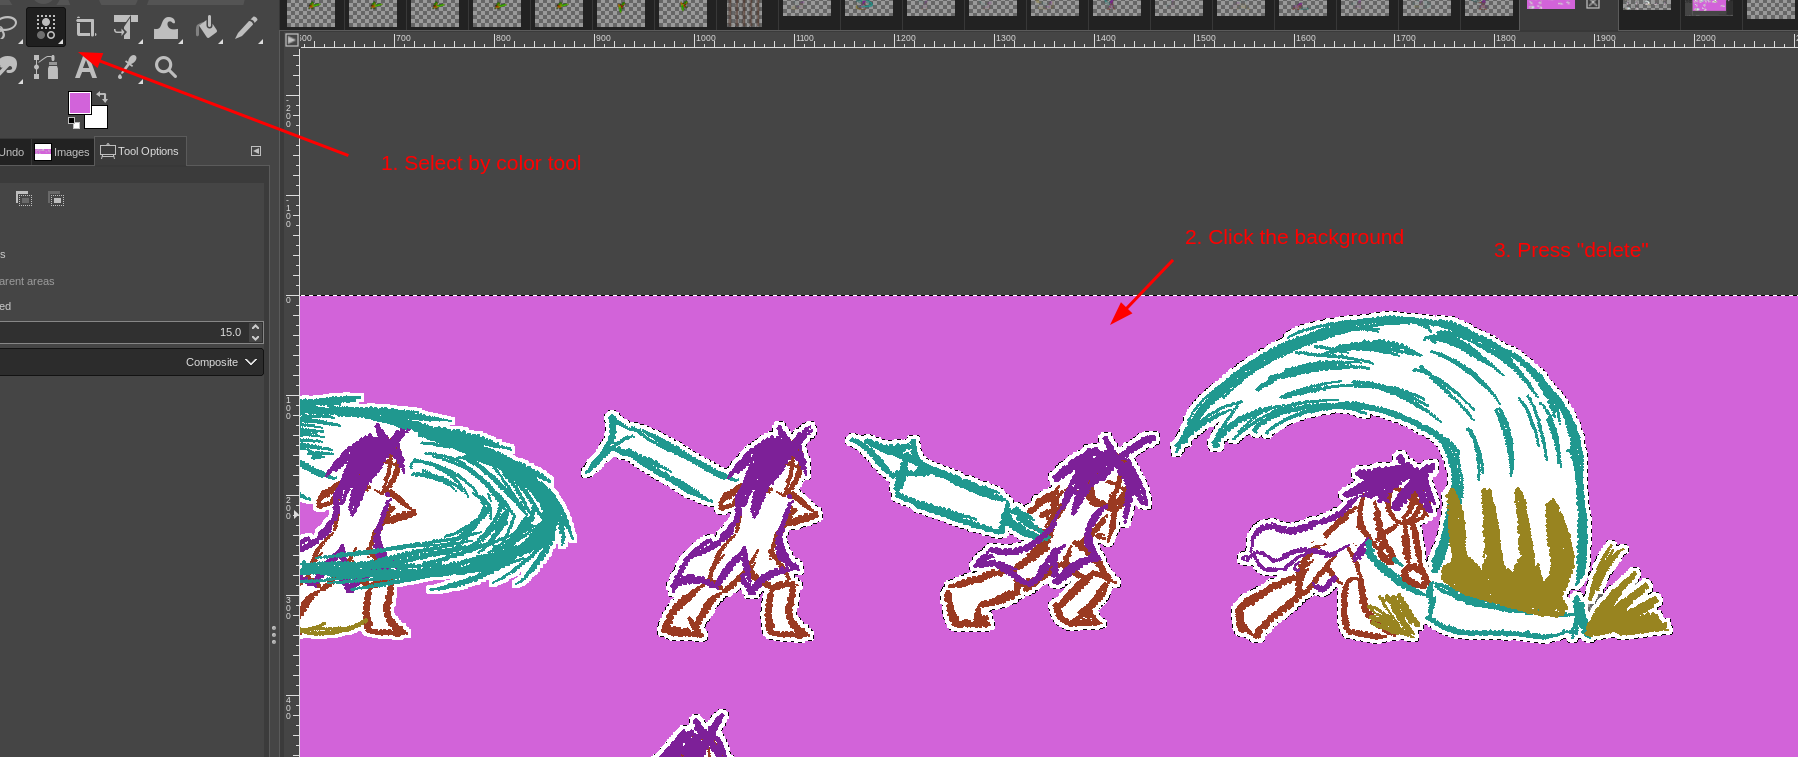
Then, on your spritesheet, make the background transparent (you can do it after, but it’s more efficient before). Use the SELECT BY COLOR tool, select the background, then press delete to remove the color
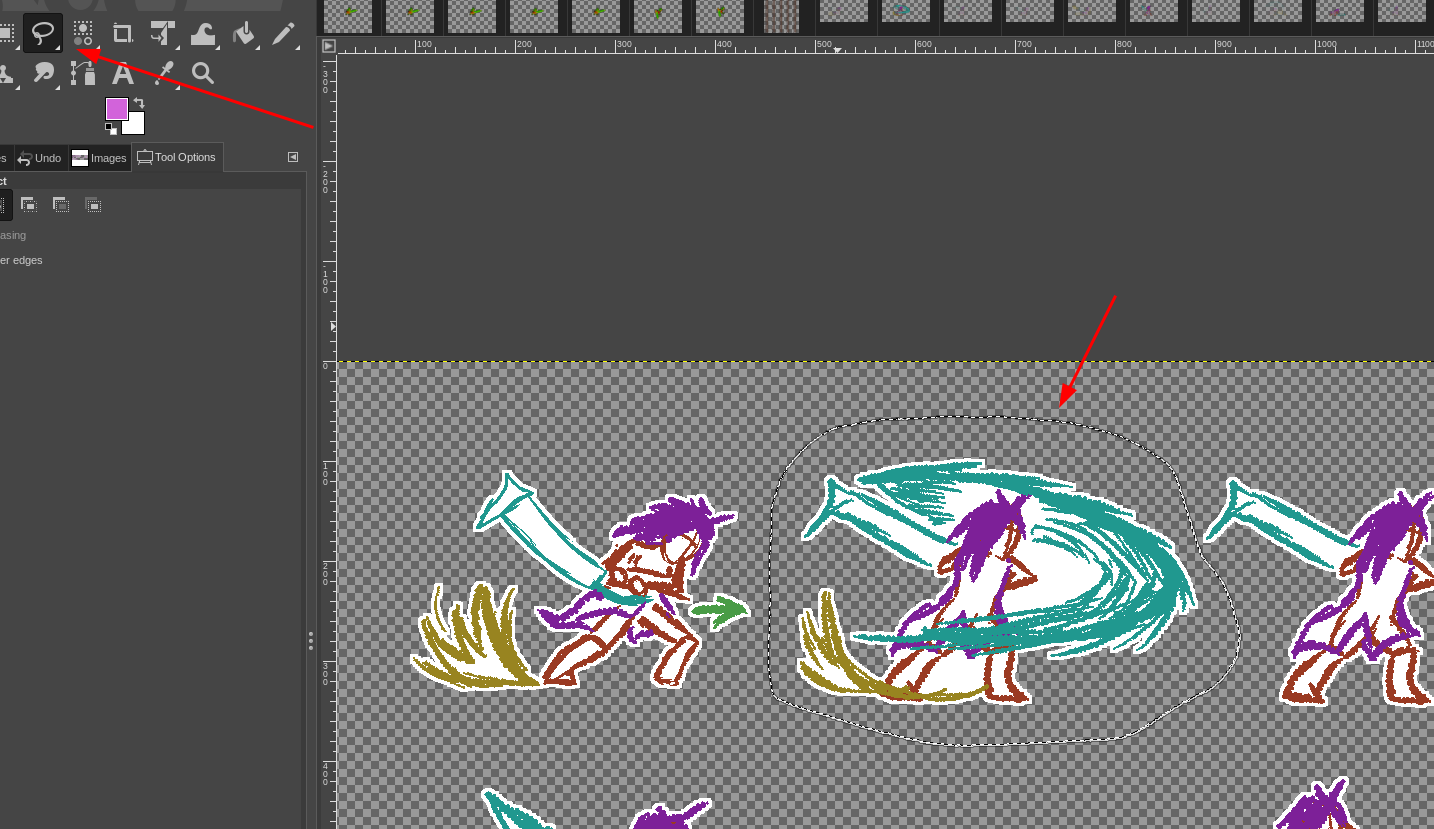
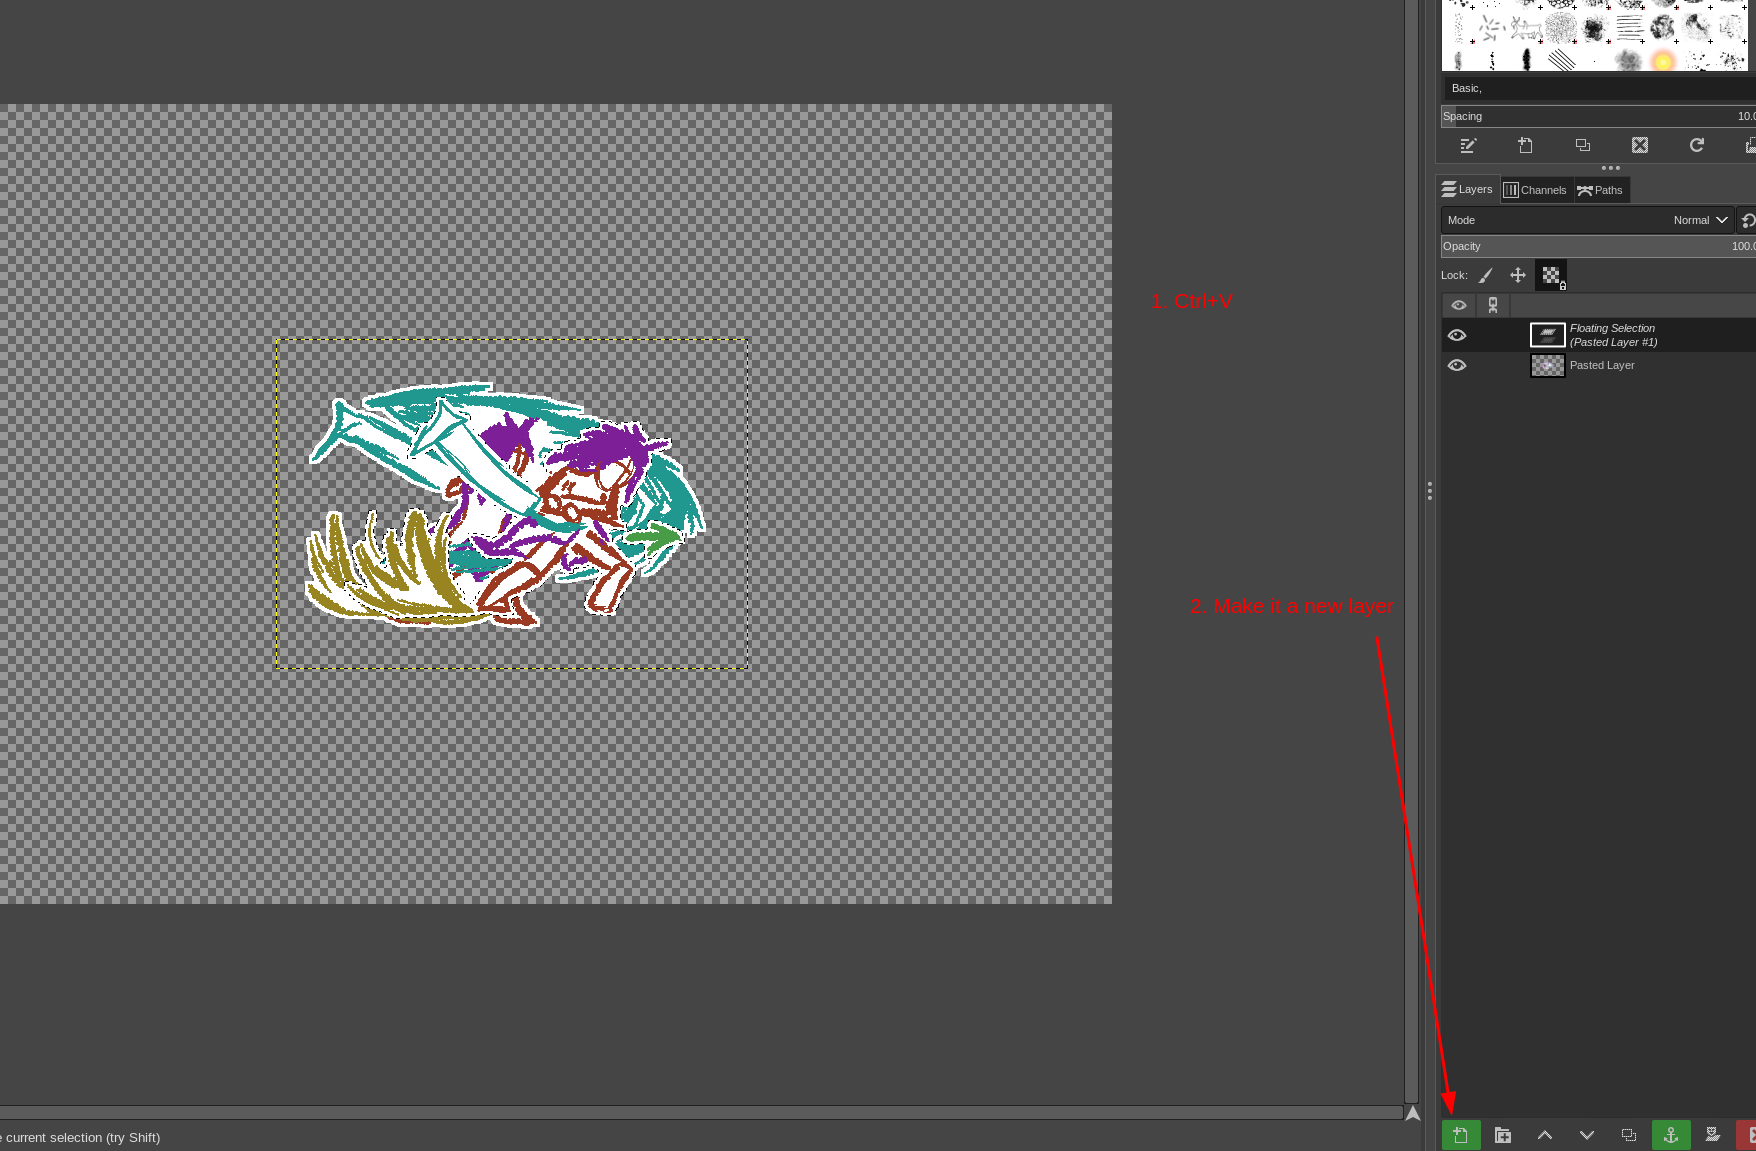
Then, for each sprite, copy it and it alone. depending on your spritesheet organisation, you might have to use a freeform selection tool. Copy it to the new image you made as a new layer. Continue once you have all the sprites you want
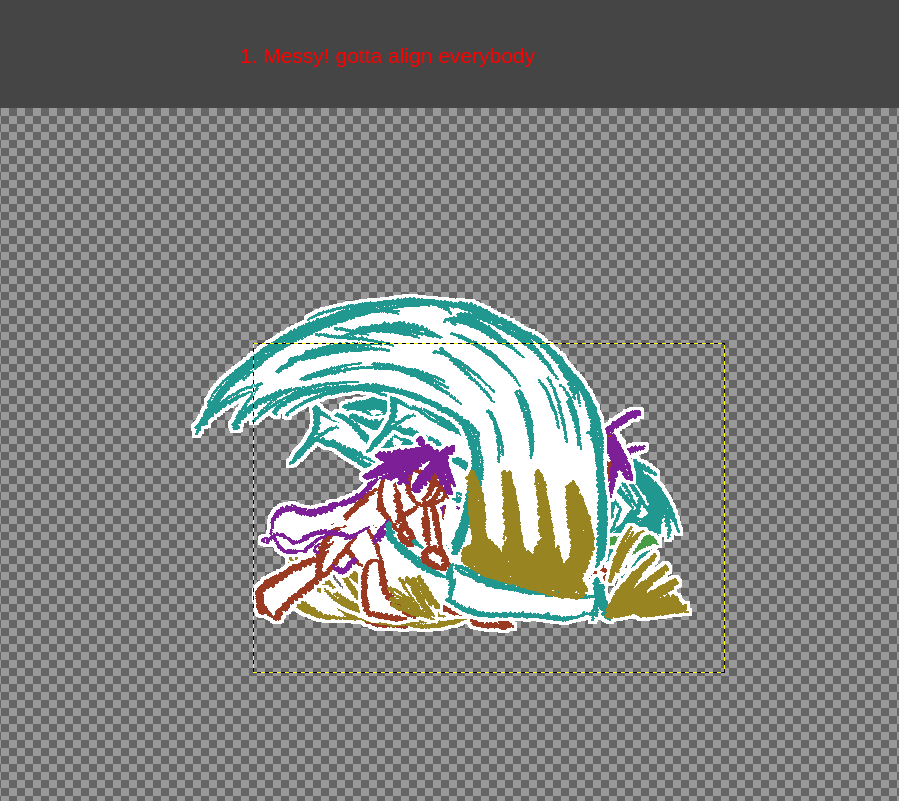
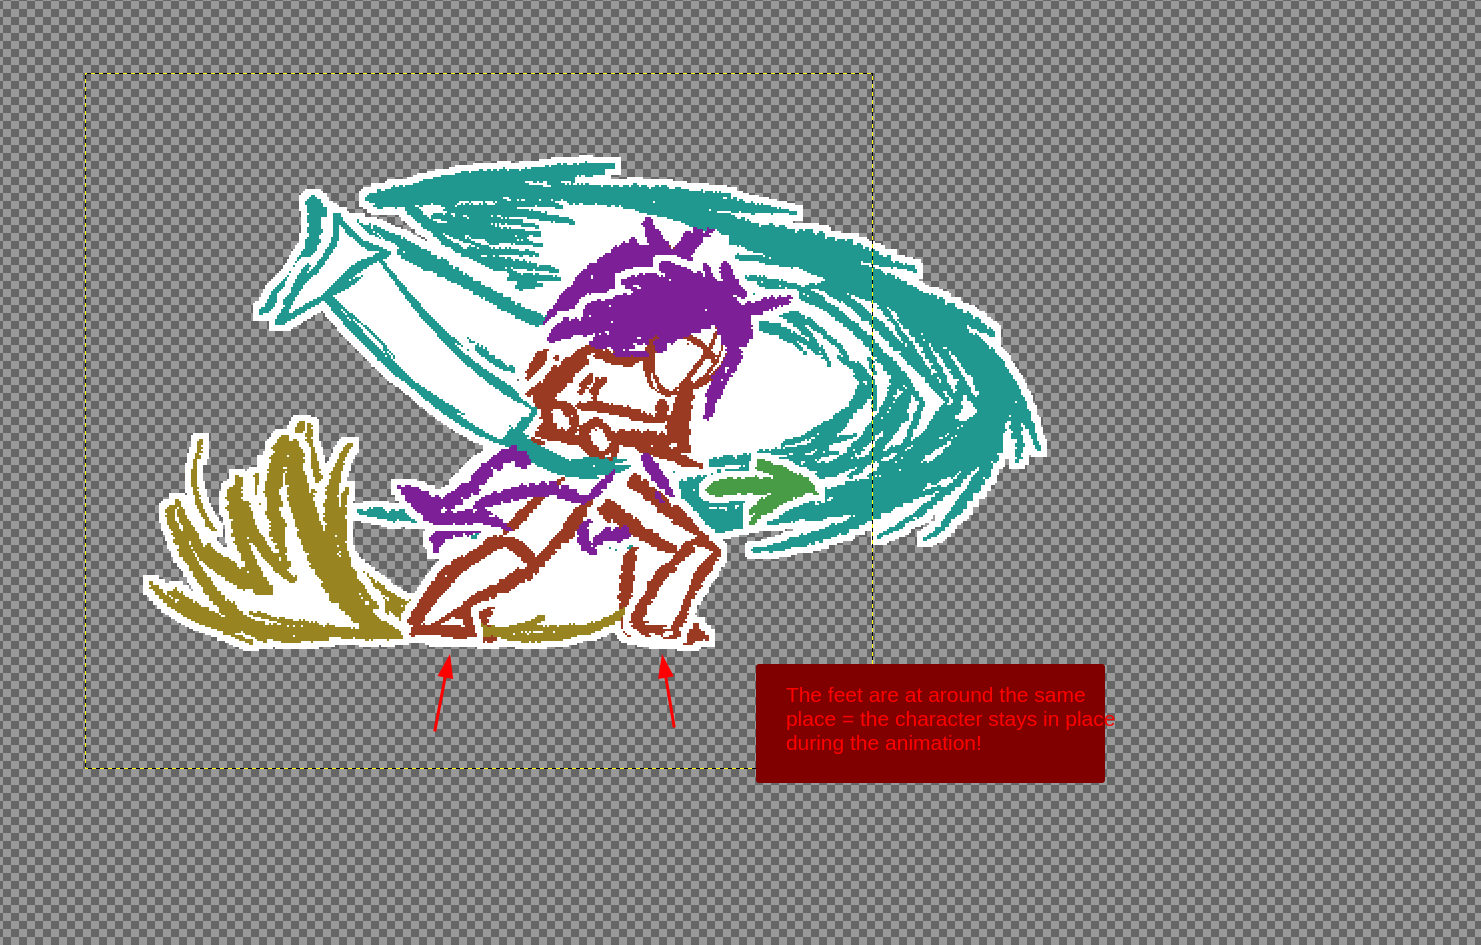
Finally! Align the sprites by moving them on top of each othersuch as it looks like the character is stable, meaning that the feet seem to stay in place pretty much. You need the “ground” to stay at the same level! You can use the move tool and transparency or visibility
STEP 3: MAKING IT A SPRITESHEET
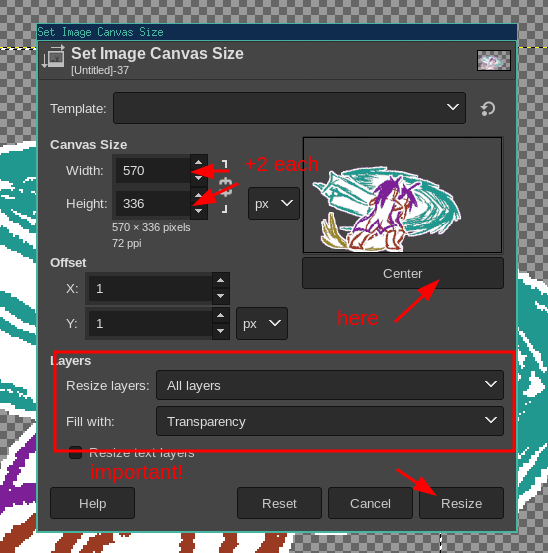
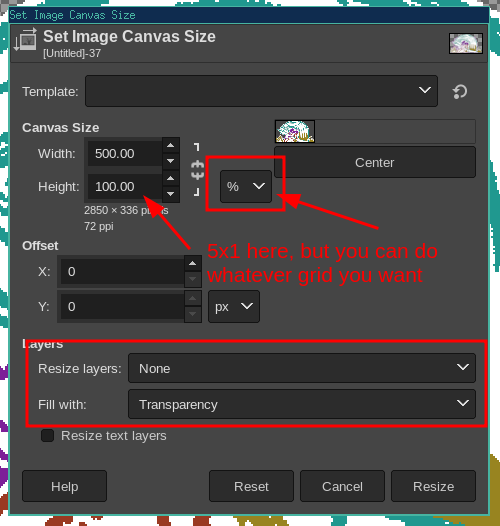
Now that all our sprites are in position, we will start by cropping the images using Image > Crop to Content, then we resize all layers for ease of use with Image > Set Canvas Size and putting the resize all layers option. GIMP won’t resize if you don’t change the size so add two pixels in each direction for a buffer

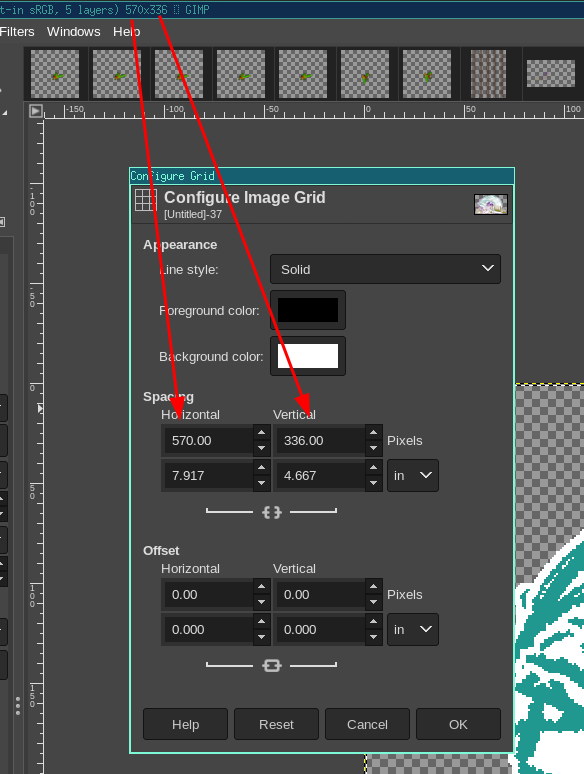
Then configure the grid for easier placement with Adjust Grid in the View menu. Also enable Snap to grid and view grid. Use a grid of the current image size as shown
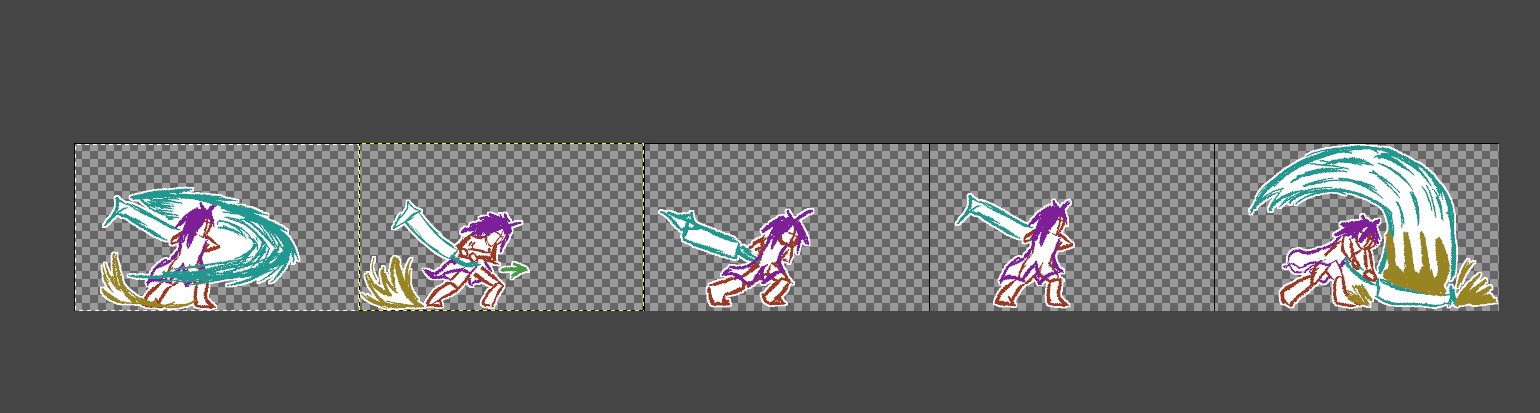
Then the big one: resize the canvas WITHOUT resizing the layers. Make it the size of spritesheet you want, you can have as many lines or columns as you prefer. I tend to like keeping mine at 5-10 columns, for this one I’ll do 5x1 (5 columns, one line)
Now, you can manually move each sprite to the correct position. The grid stuff we did makes it snap directly to the correct position. And there you go, you have a spritesheet! Now let’s put it into Castagne
STEP 4 : CASTAGNE INTEGRATION
Now you need to have Castagne read it. The first part is putting it into the res:// folder, which is your godot project folder! Launch the godot editor (which will automatically import the spritesheet) and take a note of the path of the spritesheet!
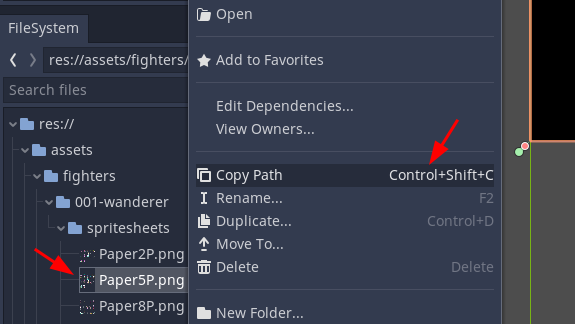
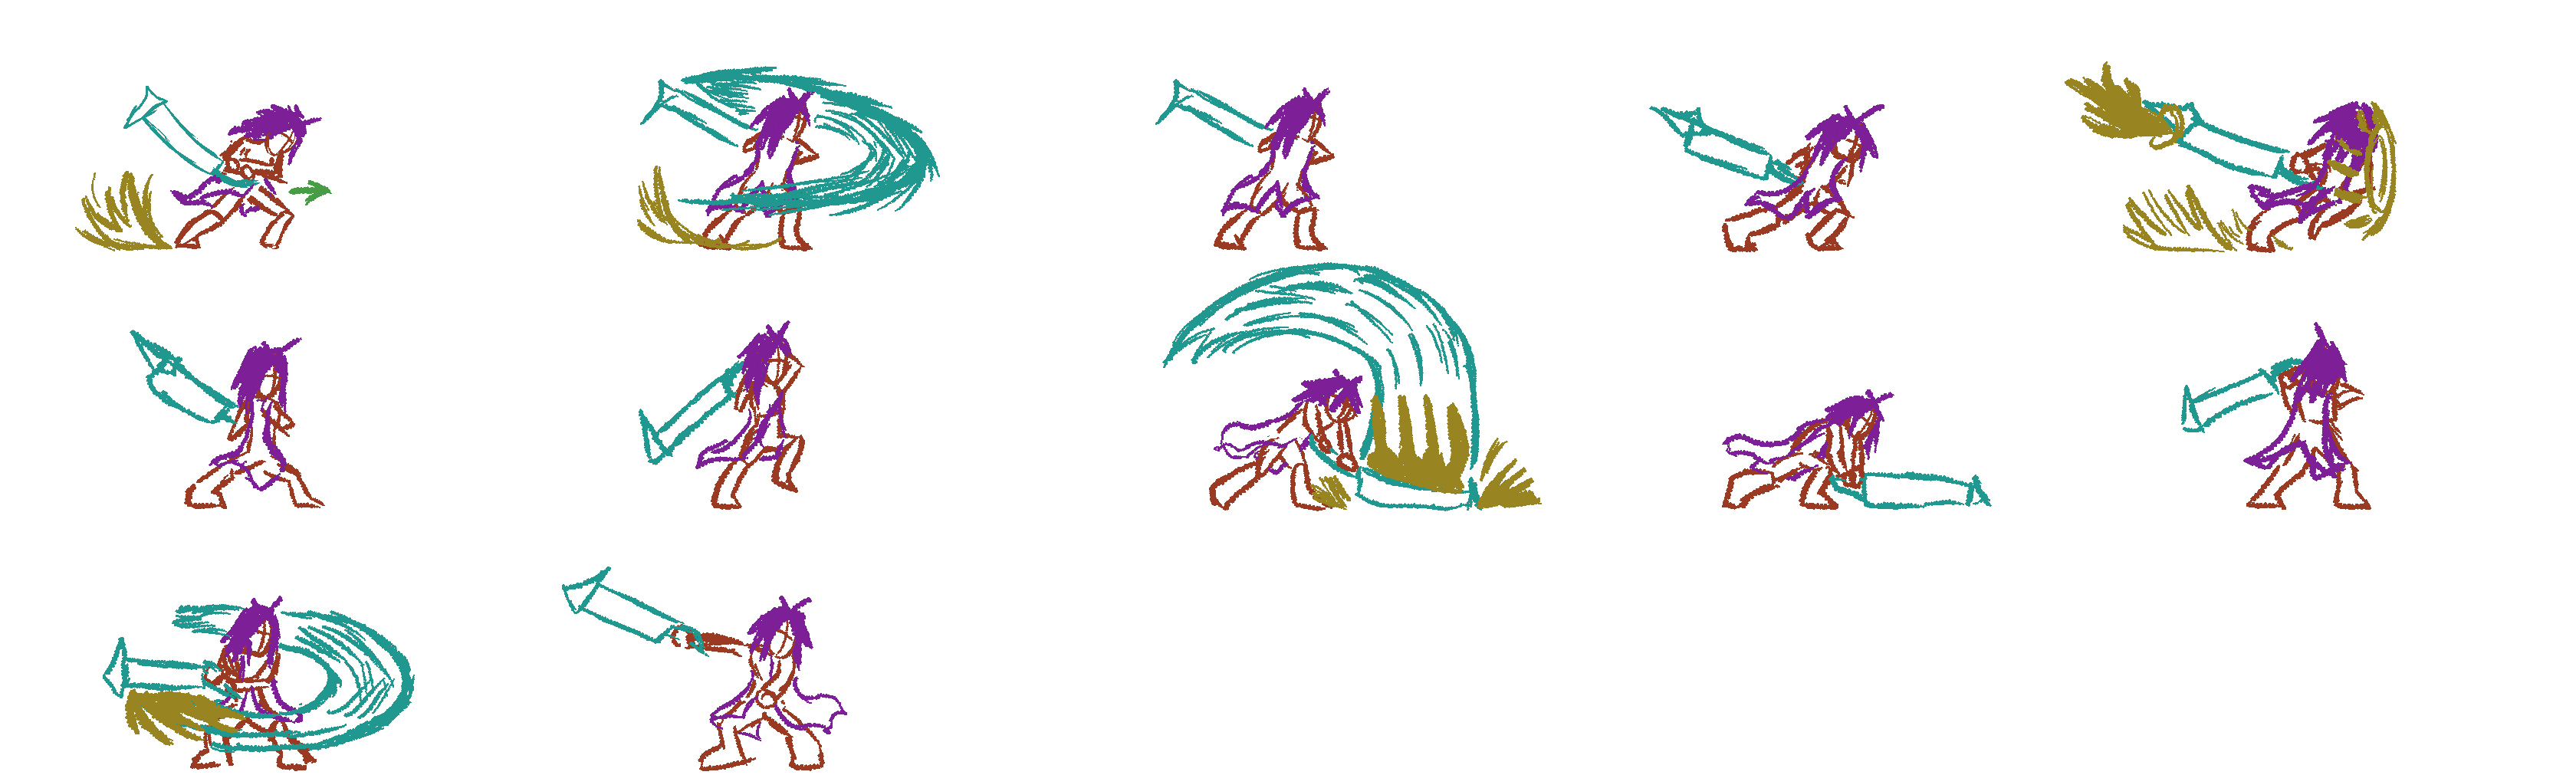
Note: I’ll be using the full Paper5P.png sheet I have instead of the one I made in the previous steps, here it is if you want to follow along
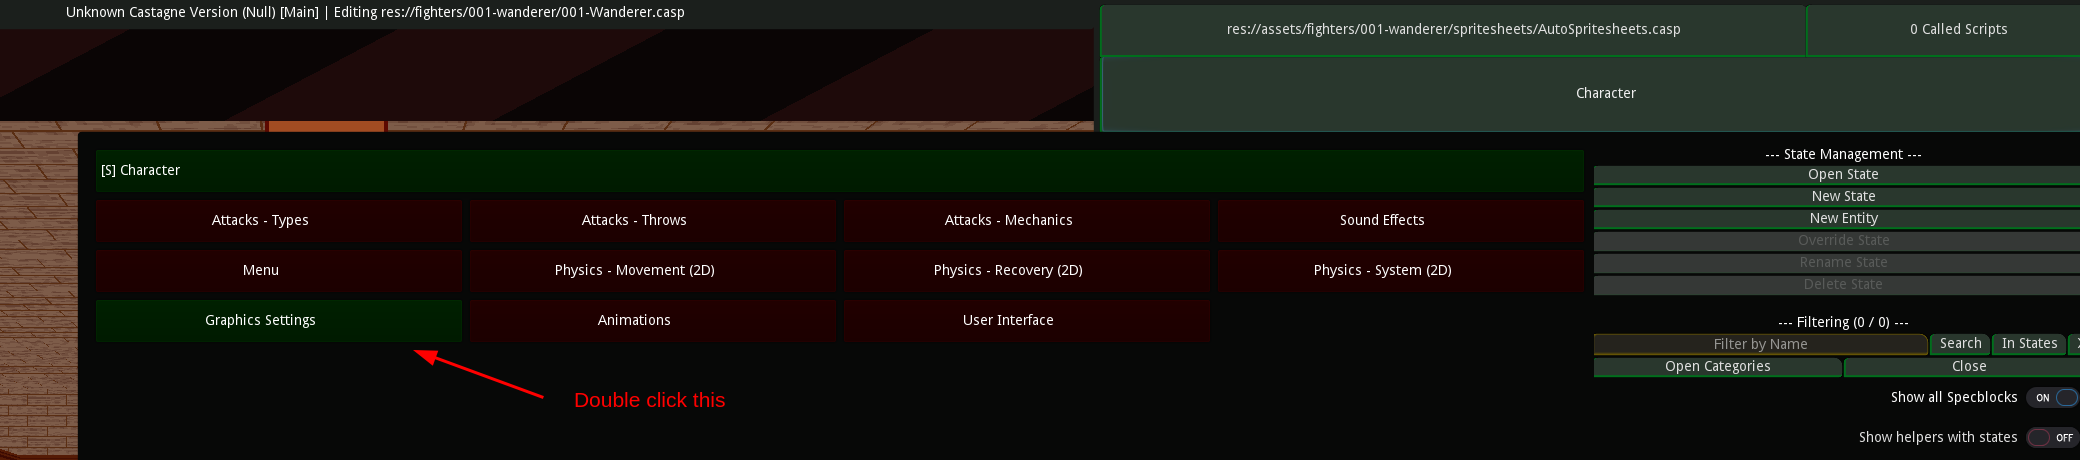
Open the graphics settings, check the Use Sprites options, and create a new spritesheet
Then, put the name of the spritesheet you’ll use to refer to it (Paper5P here) and press rename to save it
Then, paste the path into Path, it should start with res://. This is the one we copied from godot, and it should start showing your spritesheet
Then, adjust the sprites X and Y with the number of columns and lines respectively (that 5x1 we did or 5x3 for this one)

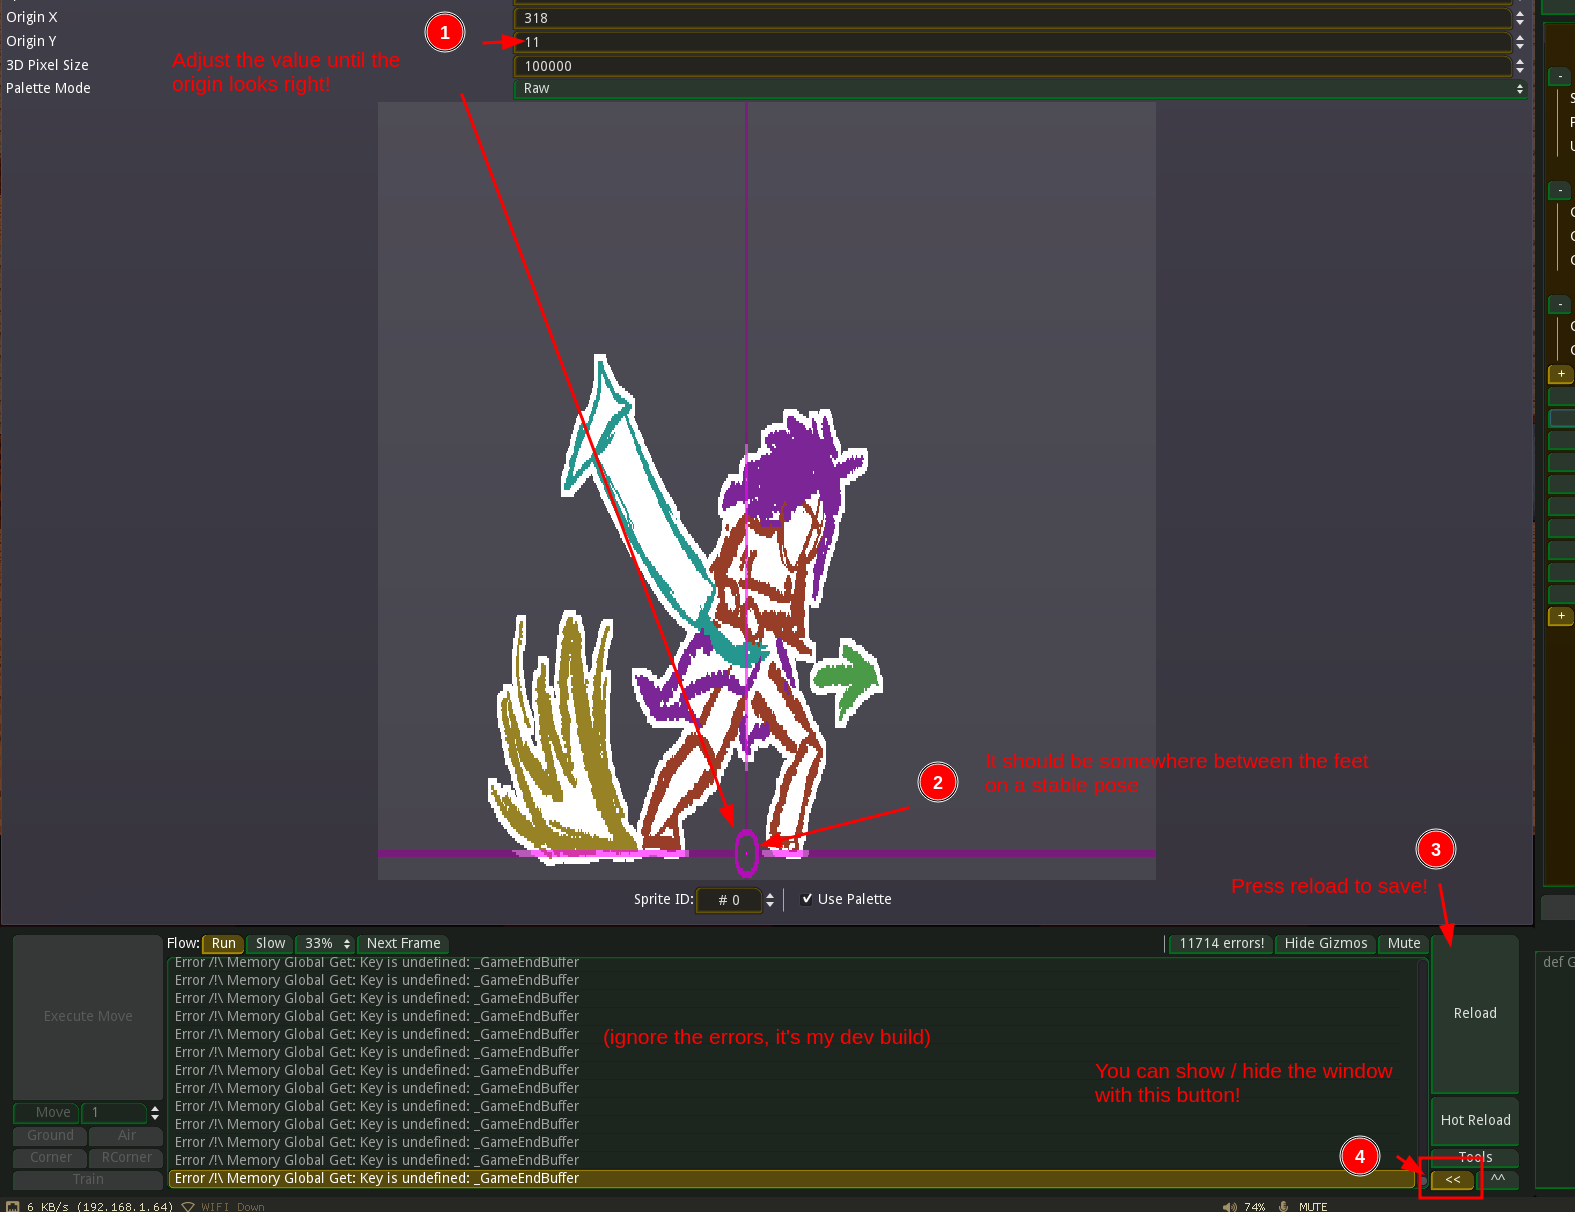
Then we adjust the origin so that the character will appear properly! It should be somewhere inbetween the legs. Press reload or save to save the parameters. The sheet is now ready to be used, so let’s do so!
At the moment, the sprite will probably be displayed if it’s the first spritesheet, but we want to use it. You can use sprite animations (not for this tutorial) but I tend to like adding the code directly. Let’s start by taking note of the IDs of the sprite in our spritesheet so we can reference them later!

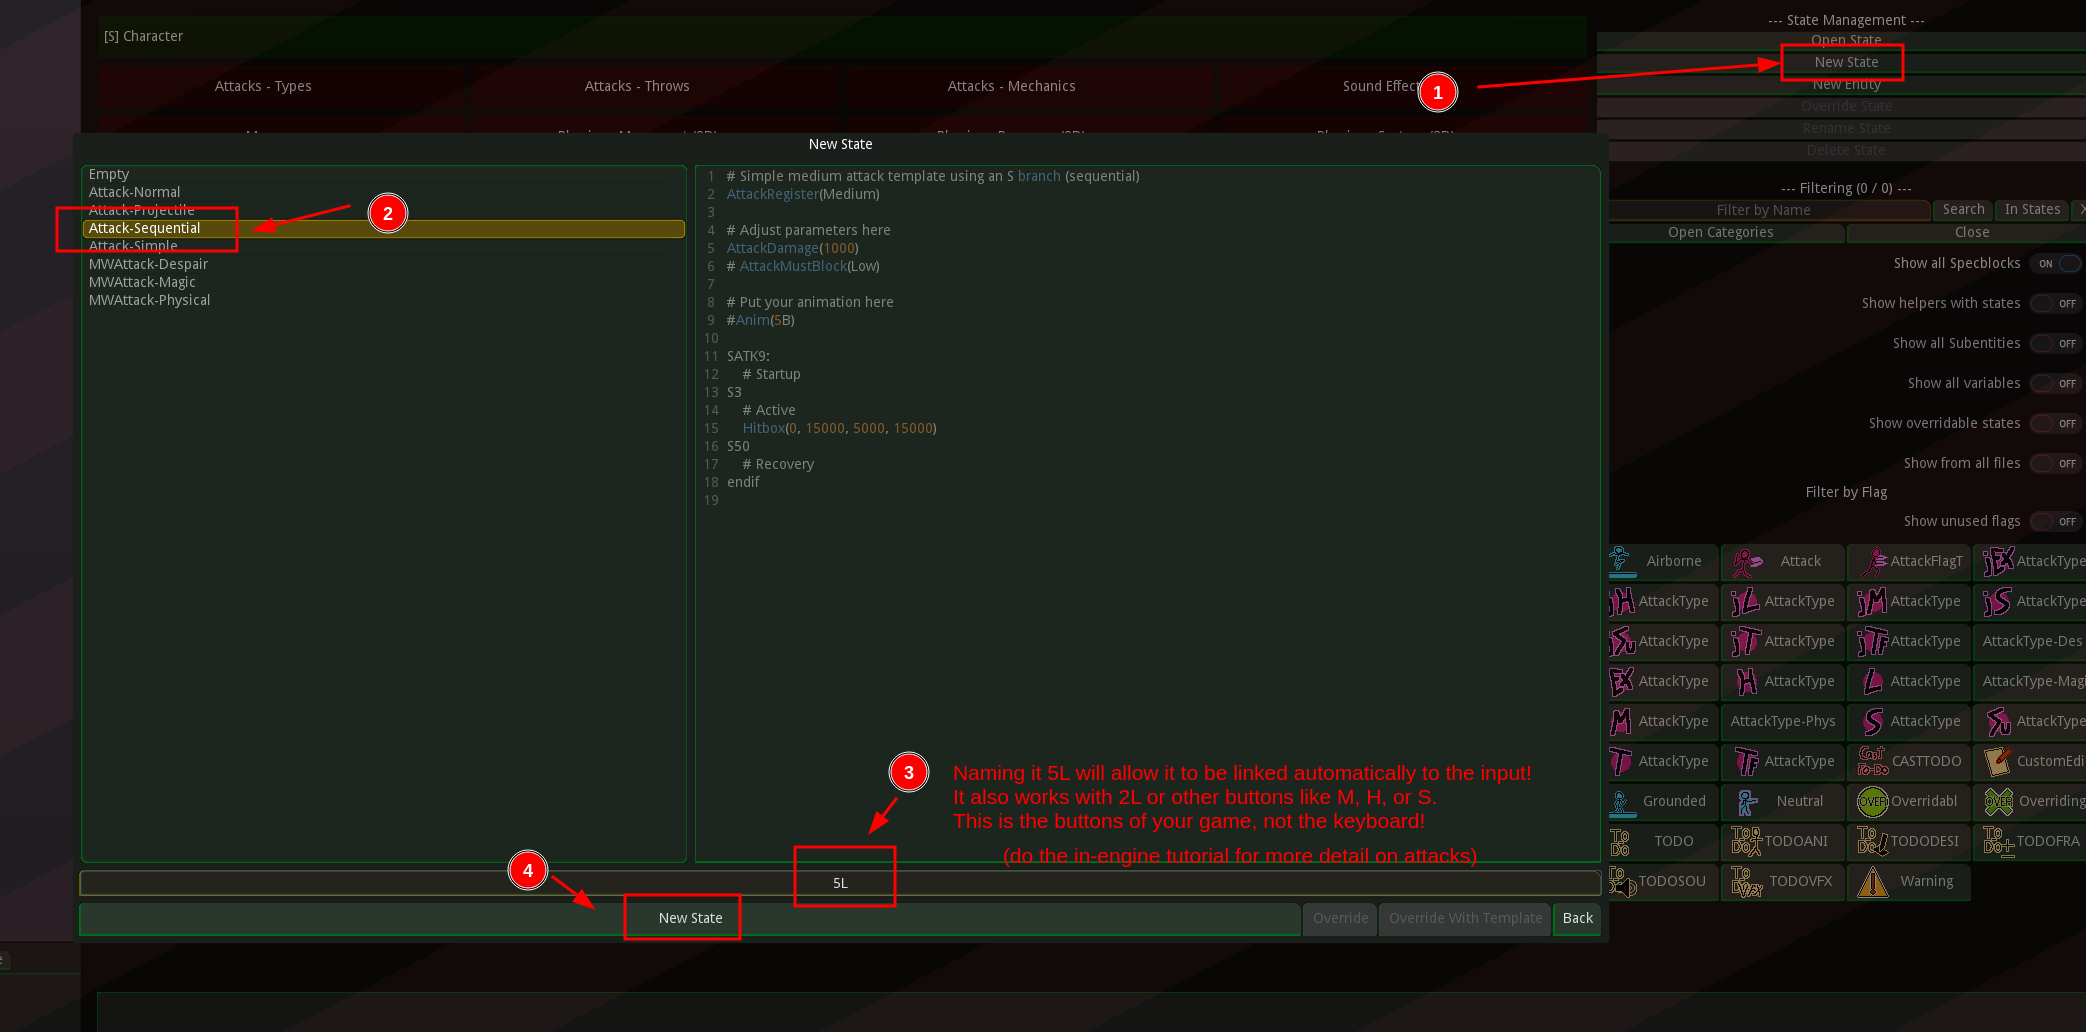
We’ll see first how to use a sprite during an attack. Create the state, then tell the engine to change the sprite during the attack by adding Sprite calls at the correct points!
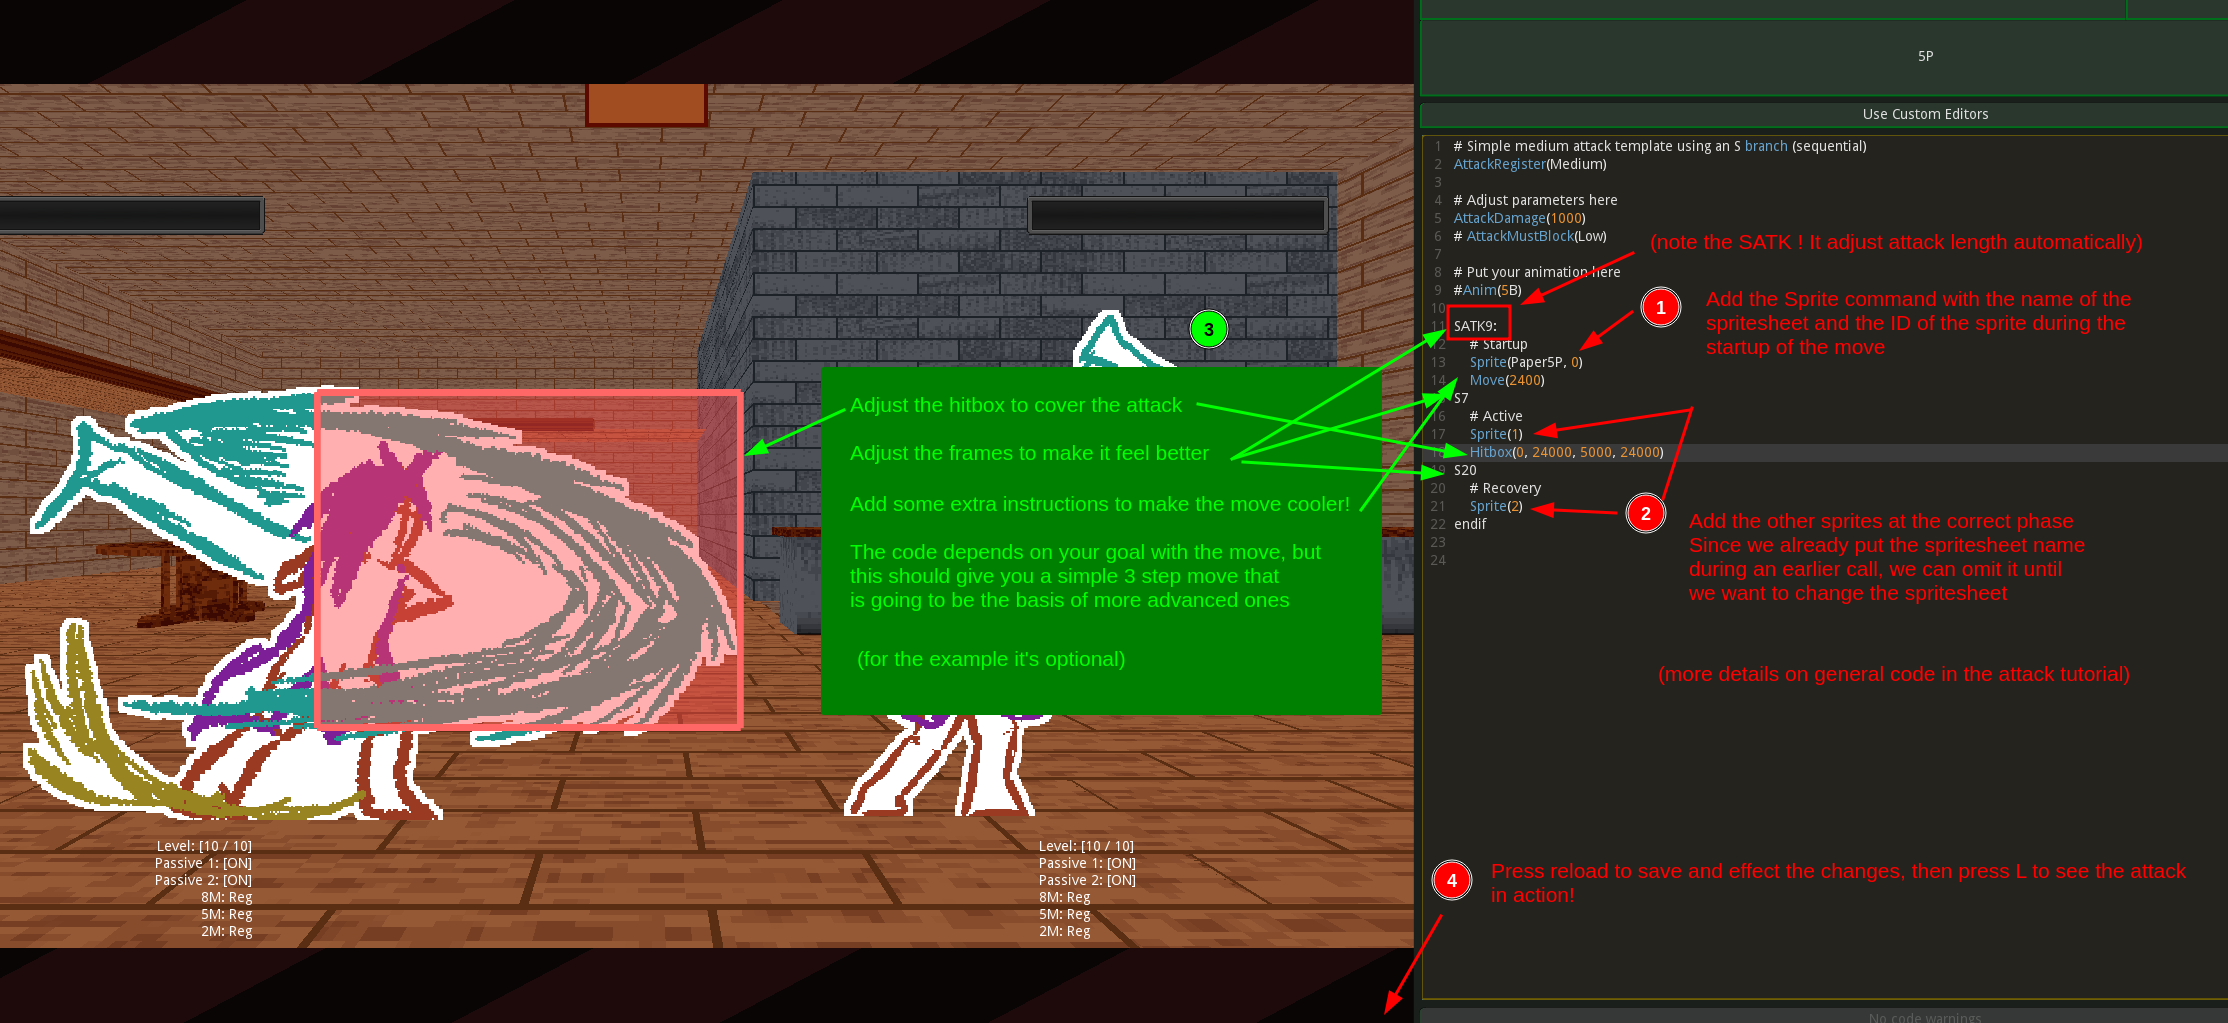
The first call needs to specify the spritesheet name, but subsequent ones don’t need it if you don’t want to change the sheet you’re using
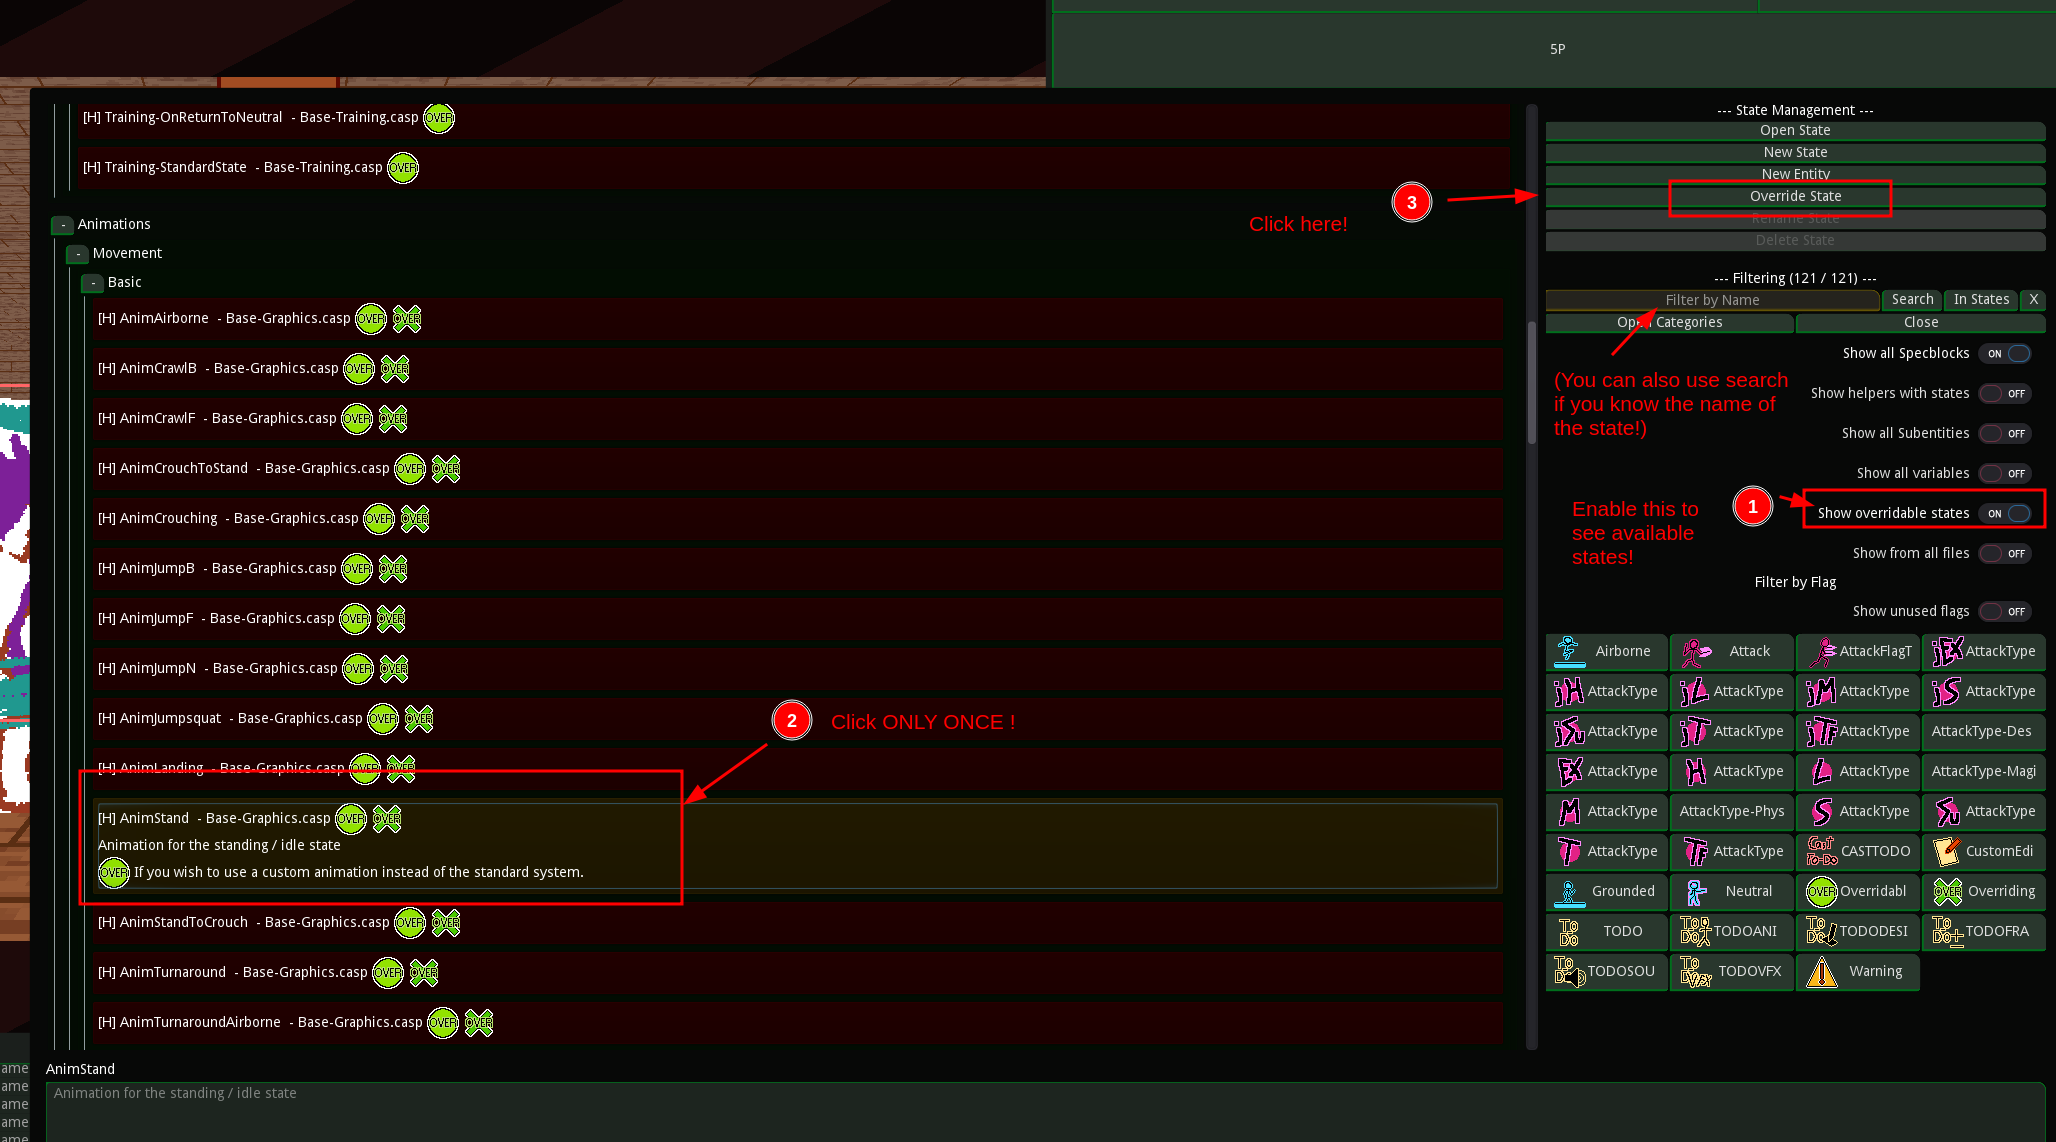
Finally, let’s see how to put our regular animations. Sprite anims are more useful there than for attacks, but we’ll do it with code since I like it better. start by overriding the state that corresponds to the animation you want, here it’s AnimStand!
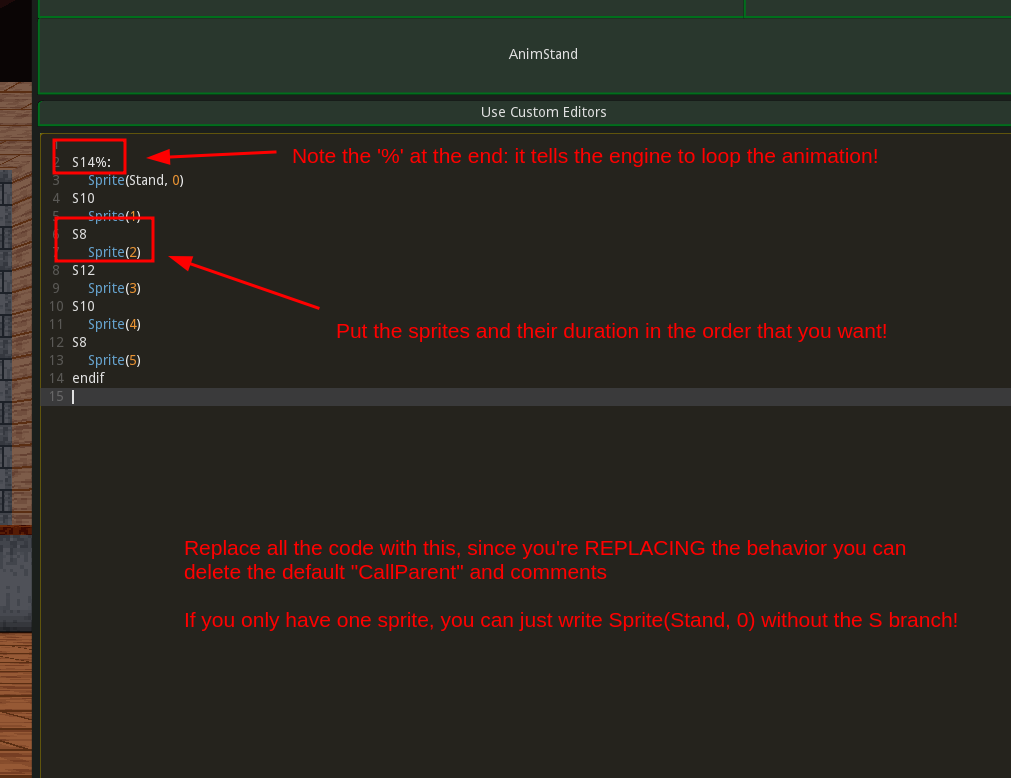
Then, just put the animation using an S branch like we just saw. You can replace the default code, since you’re replacing the animation you don’t need the “CallParent”, as it will potentially cause problems.
Use ‘%’ at the end of the S branch declaration to loop!
There you go! You know have assembled a spritesheet and imported it into Castagne!
BONUS: PALETTES
You might now want to change the colors on your sprites. This is a bit more complex than you might expect, as it won’t read indexed colors (and anyway, if you need a spritesheet tutorial you probably don’t know what that is)
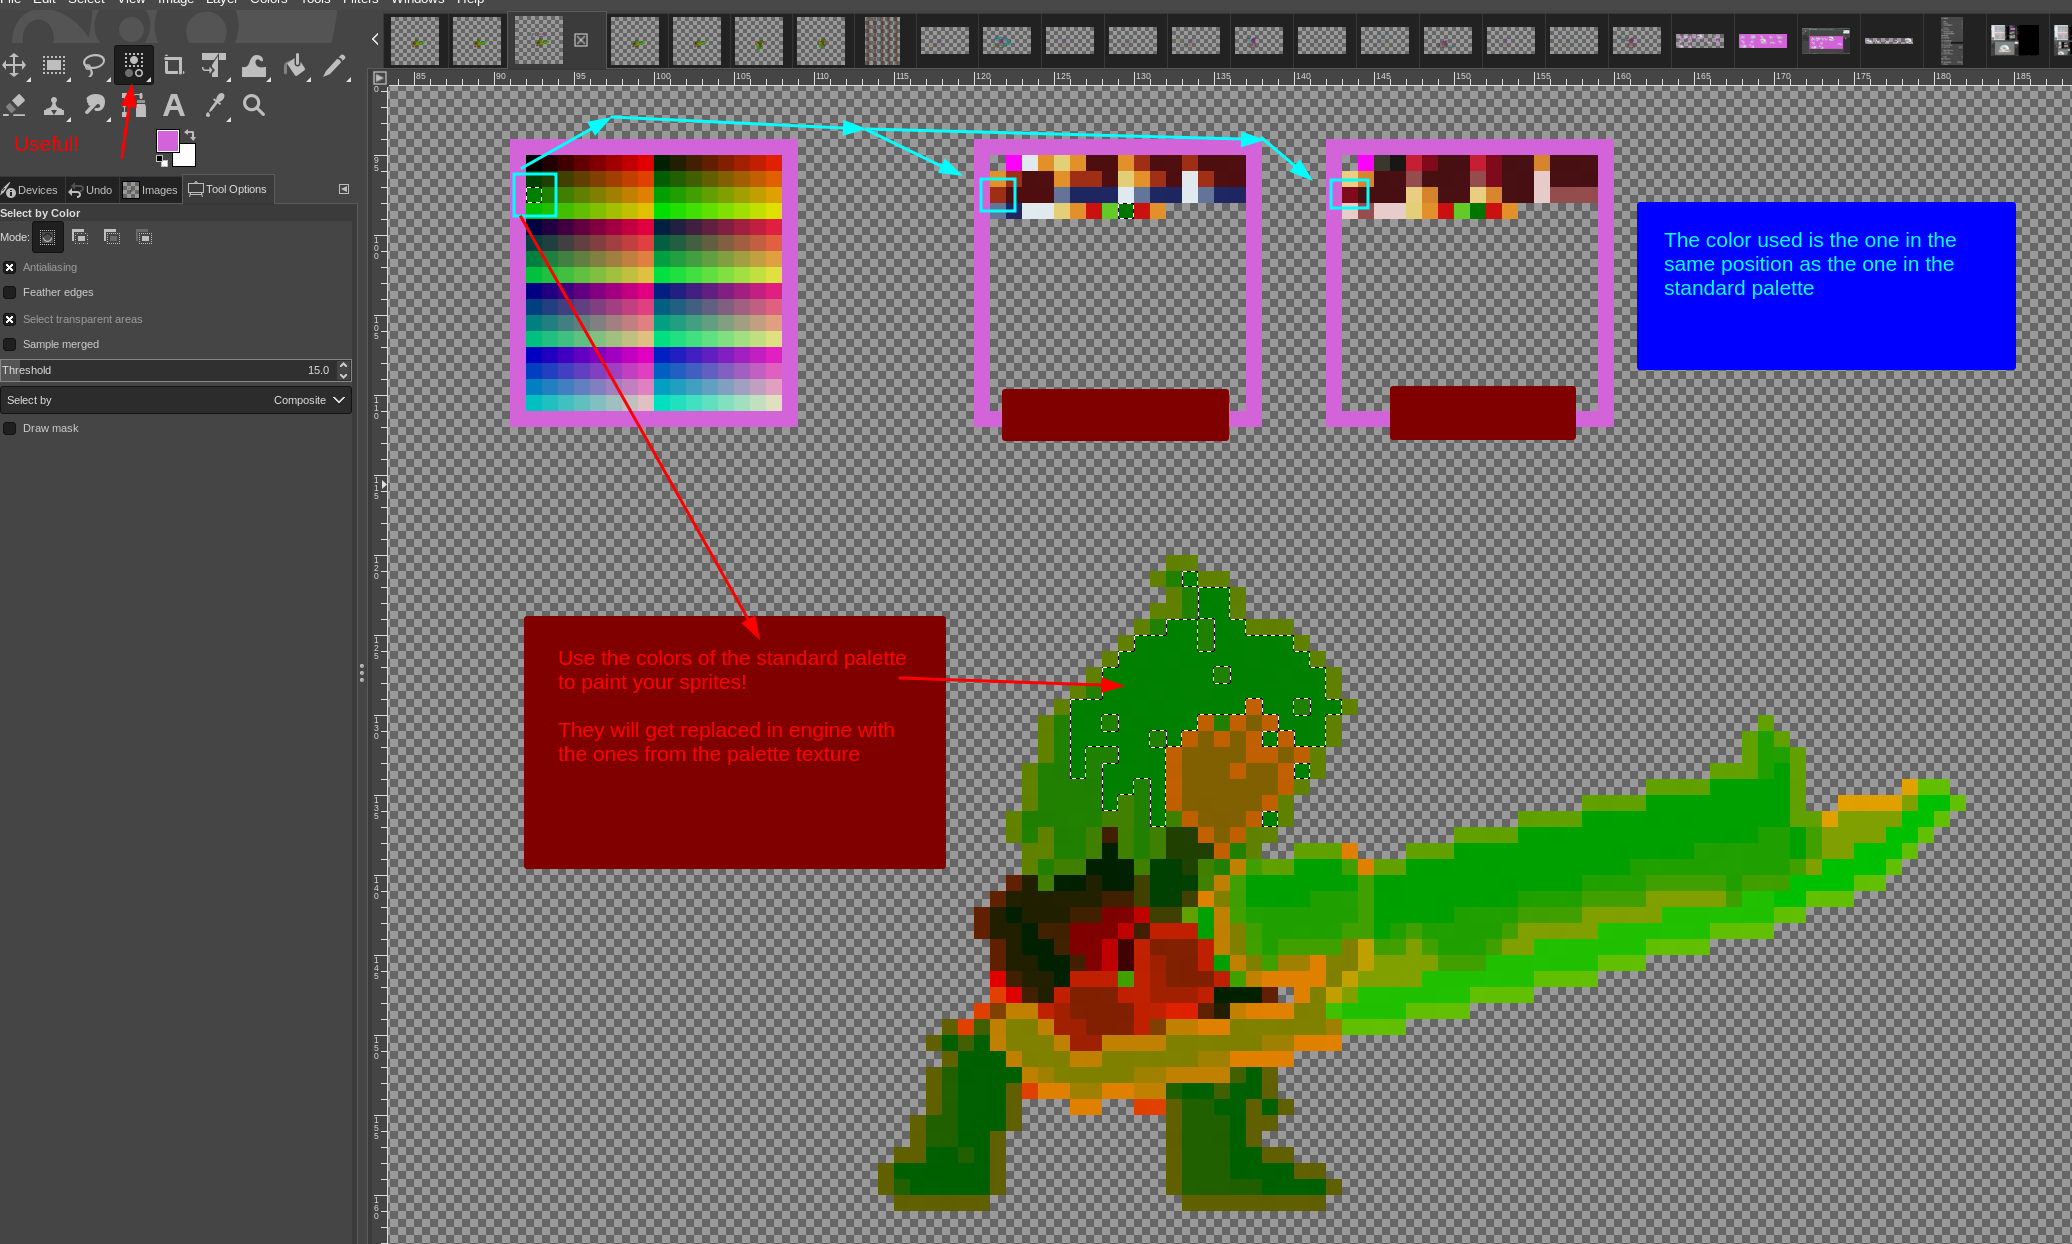
You will need to use special colors, from the standard palette found in res://castagne/assets/helpers/palette !
You’ll need to paint your sprite using these colors, then copy the palette and change the colors as you want them to be! This will make your sprite recolorable.
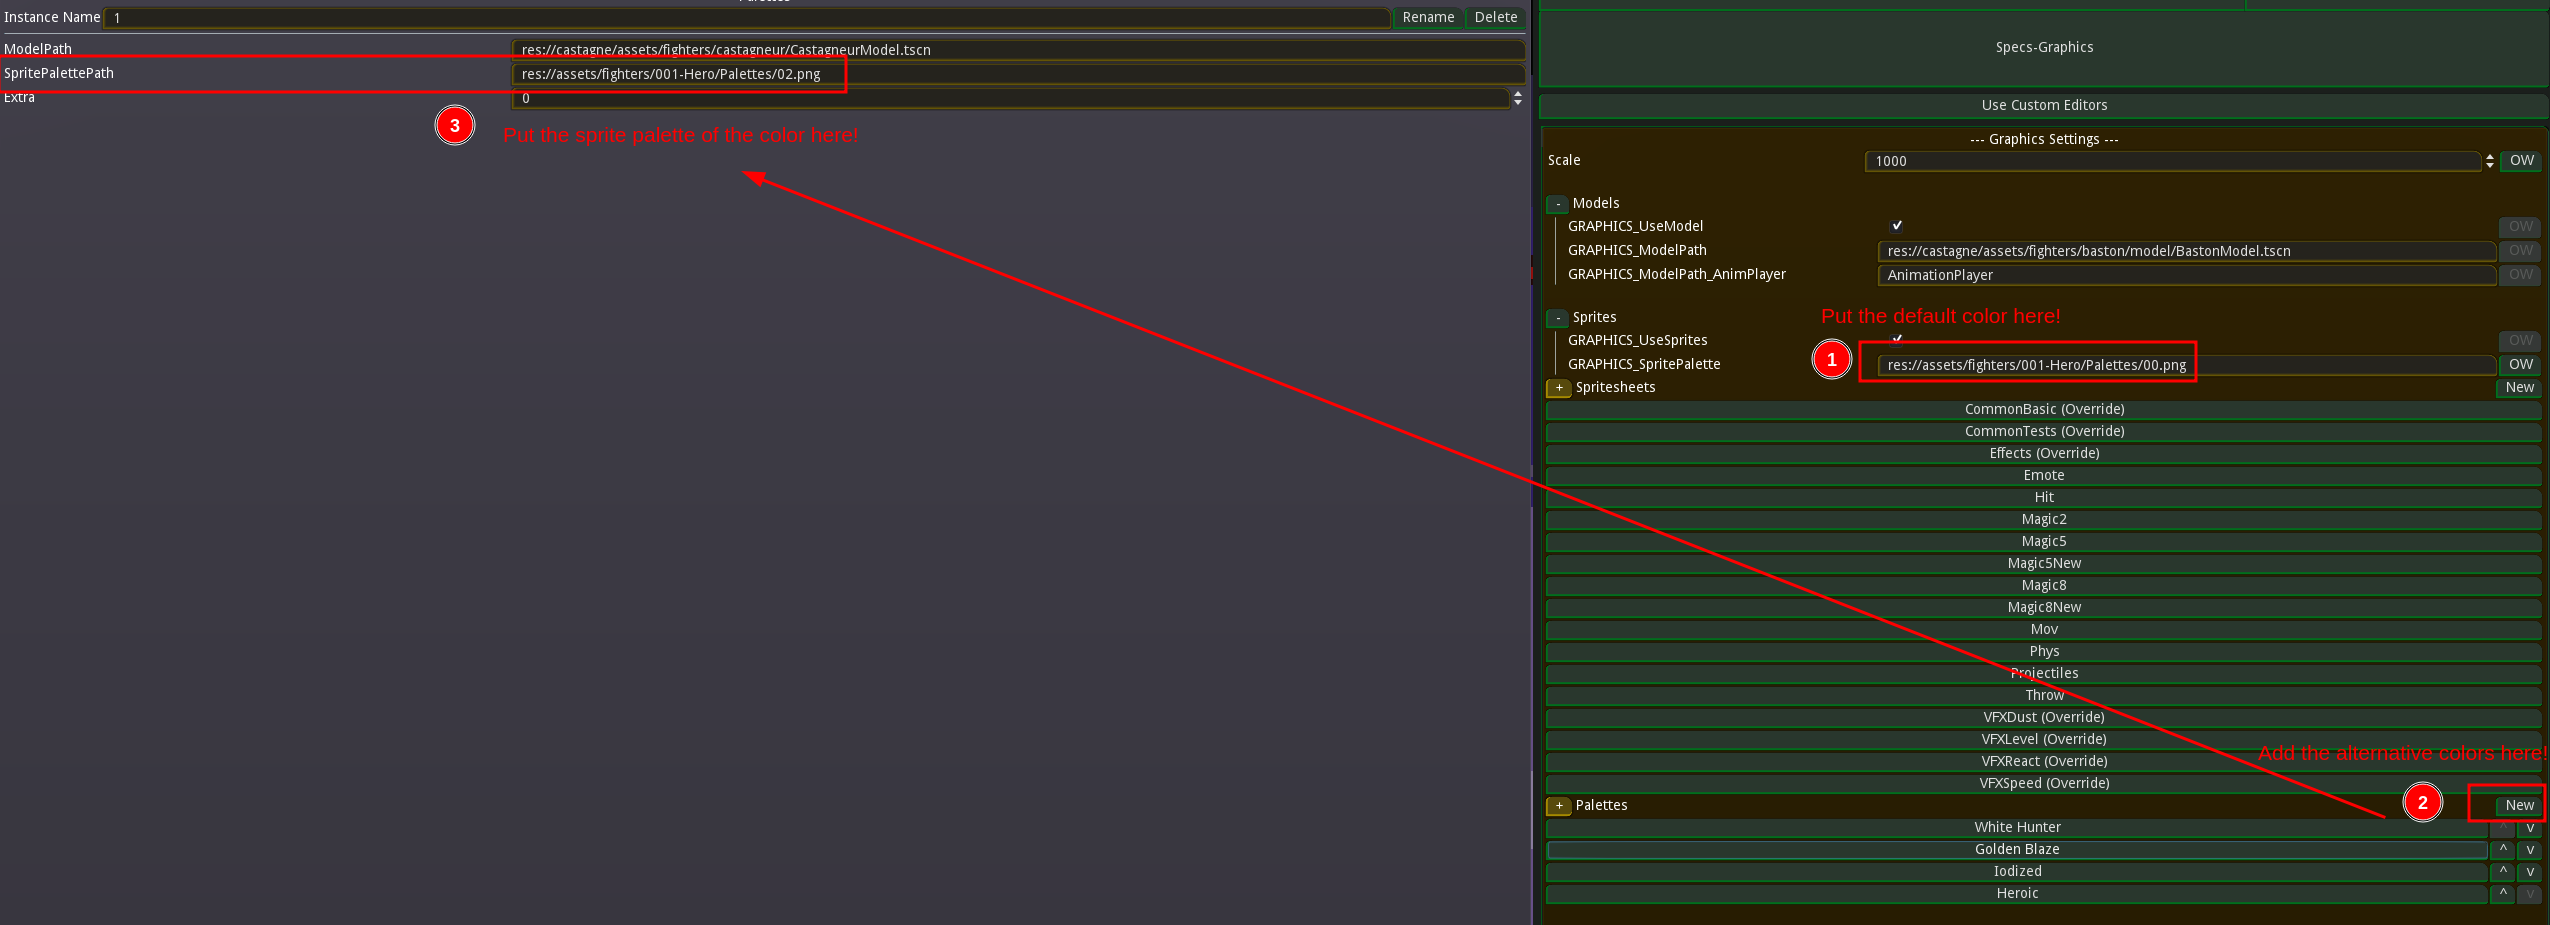
Finally, tell Castagne what your palettes are like so: the default palette goes in GRAPHICS_SpritePalette, the extra ones are added at the bottom. Then, tell Castagne to use palettes for this spritesheet, if not it will just show the raw colors you put in. Reload and you should be good to go!

THERE WE GO! We saw:
- How to make a godot sprite sheet
- How to import it in Castagne
- How palettes work (more advanced, optional when starting out)
This should help get you started!